PCoIP Streaming Video Performance

The network between my desk and our lab is controlled by corporate IT.  In order to have access to lab equipment at my desk I had to set up a simple PPTP VPN running on a Windows Server 2008 R2 VM.  Needless to say, it doesn’t provide the best throughput, but it meets about 95% of my needs.

Enter View 4.6 PCoIP Secure Gateway.  Since View Secure Gateway proxies the PCoIP connection I was absolved of the need for the VPN…

However, like any good engineer, once I had some free cycles I decided to test what the maximum video performance of View could be.  I fired up Band of Brothers Episode Two and watched at an amazing 5 frames per second.  I logged onto my Wyse P20 and saw that the “Active Bandwidth Limit” was set to 7000Kb.

Nothing that I tried seemed to improve the performance until my local VMware Sales Engineer stopped by and I showed the video performance to him.  He gave me some suggestions on how to improve the performance, but mentioned that it looked like the video was being rate limited.  This set off a spark in my head and after a couple of hours googling for “VMware View rate limit” I stumbled upon the answer… provided by our friends at EVGA.

Turns out that when you enable a Secure Gateway Server you are limited to using AES-128-GCM encryption and 7000Kb… which makes sense for using View over the WAN.  When I unchecked the box “Use PCoIP Secure Gateway for PCoIP connections to the desktop” in the General tab of View Connection Server Settings I was able to obtain much better video performance… up to 24 frames per second with the zero client resolution set to 1280×1024.

When I turned up the resolution to the full 1900×1200 of my monitor I was back to 5 frames per second.  It seems that the SALSA256-Round12 encryption is limited to 20 Mb/s.  Perhaps this will get better in View 5.0?
Configure FC Storage port on UCS

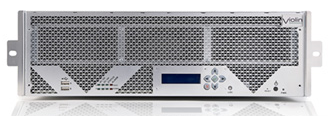
Today we received a Violin Memory 3140 Flash Memory Array in our lab for testing. This device is basically a SAN made out of flash memory and is said to be capable of 200,000 IOPS.

It uses Fibre Channel as the storage protocol (it can also do iSCSI) and the only Fibre ports we have in our lab are on our UCS Fabric Interconnect. I thought that this would be no problem since Cisco released Firmware 1.4 for the fabric interconnects which allows direct connection of Fibre Channel devices to the Fabric Interconnect. I connected the cables changed the port type to “Configure as FC Storage Port”… the ports changed immediately to Administrative Down. After searching for a couple hours to find the procedure to enable direct connection of the fibre channel devices I finally found it on this blog. The Fabric Interconnect needs to be set to “FC Switching Mode” and “Enable Default Zoning” needs to be selected on the VSAN that is configured for the FC ports.

EVGA PD02

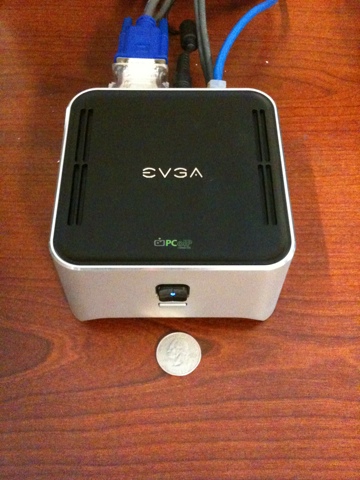
Finally I was able to get my hands on the EVGA PD02. It is very sleek and has a brushed aluminum exterior. It is smaller than a Mac mini. After running for an hour I noticed that the exterior is uncomfortably warm to the touch. When logged in to a VMware View session the Kill-a-Watt reads 10.5 watts.

EMC Celerra: Change LUN masks in CLI

In our lab environment we are fortunate to have an EMC NS-120.  Unfortunately we do not have iSCSI modules for it. In order for our non-fibre channel VMware hosts to access these LUNs we are forced to share them though a Celerra NAS appliance.

As you can see I have several initiators that need their LUN Masks changed. In order to change them through the GUI I would have to click properties on each initiator, change the Grant LUNs field and click OK.

There must be a quicker way!

Browsing the EMC Powerlink support site I stumbled across this little gem of information. All of the commands run by the GUI are logged in this file: /nas/log/cmd_log

I changed the LUNs granted on one of the initiators and the log file showed me that the command is:

server_iscsi server_2 -mask -set EMC01 -initiator iqn.1998-01.com.vmware:ucs01 -grant 1-2

Unfortunately there is no Grant ALL command, but I found that using the command line was much faster than using the GUI! For further information here is the information provided by server_iscsi – help:

usage: server_iscsi { <movername> | ALL }

-target {

-alias <alias_name> [-Q <iscsi_name>]

-create [<pg_tag>:np=<np_list> [<pg_tag>:np=<np_list> …]]

| -delete <alias_name>

| -rename <old_alias_name> <new_alias_name>

| -bind <alias_name> <pg_tag>:np=<np_list>

| -unbind <alias_name> { <pg_tag> | np=<np_list> }

| -info { <alias_name> | -all }

| -stat { <alias_name> | -all }

| -list

}

| -lun {

-number <lun_number>

-create <target_alias_name> -size <size>[M|G|T] -fs <fs_name>

[ -vp {yes|no} ] [ -readonly {yes|no} ]

| -extend <lun_number> -target <target_alias_name> -size <size>[M|G|T]

| -delete <lun_number> -target <target_alias_name>

| -info { <lun_number> | -all } [-target <target_alias_name>]

| -stat { <lun_number> | -all } [-target <target_alias_name>]

| -modify <lun_number> -target <target_alias_name> -readonly {yes [-Force] | no}

| -list [-target <target_alias_name>]

}

| -mask {

-list [<target_alias_name>]

| -info <target_alias_name> {-initiator <initiator_name> | -all }

| -set <target_alias_name> -initiator <initiator_name>

{ -grant <access_list>

| -deny <access_list>

}

| -clear <target_alias_name> -initiator <initiator_name>

}

| -ns isns

{ -info

| -set { -server <IP>[:<port>] | -esiport <port> }

| -clear { -server | -esiport | -all }

}

| -service { -start | -stop | -status }

| -snap {

-list [ -target <target_alias> [ -lun <lun_number> ] ]

| -info <snap_name>

| -create -target <target_alias_name>

-lun <lun_number>

[ -data <app_data> ]

| -modify <snap_name> -data <app_data>

| -delete { <snap_name> | -target <target_alias_name> -lun <lun_number> }

[ -Force ] }

| -restore <snap_name>

| -promote <snap_name> -initiator <initiator_name>

| -Demote <snap_name> [ -Force ]

}

| -help

FusionIO Testing

I was fortunate to get my hands on a couple of FusionIO cards and put them into my lab.  If you have never heard of FusionIO, they are Flash storage married to a PCIe card.  You can see the size comparison to the EMC NS-120 disk array that is in the lab.

FusionIO-vs-EMC

FusionIO claims that their cards can do 100,000 IOPS.  Of course on their website they say that they achieve 100,000 IOPS using 512b IO segments.  I wasn’t sure how useful this would be in the real world, but I used this as a starting point of comparison to my EMC NS-120.  I decided I would leverage my VMware View 4.5 environment in these tests.

I created a VM that would run IOmeter as a service on boot and connect to a master IOmeter VM.  I then used VMware View to scale to 50 worker VMs.  All of the worker VMs are running on two Cisco UCS B200 M1 blades with 2 Quad Core Xeons and 48GB of RAM.  The FusionIO cards are in a Cisco UCS C-210 rack mount server with 2 Six Core Xeons and 48GB of RAM.

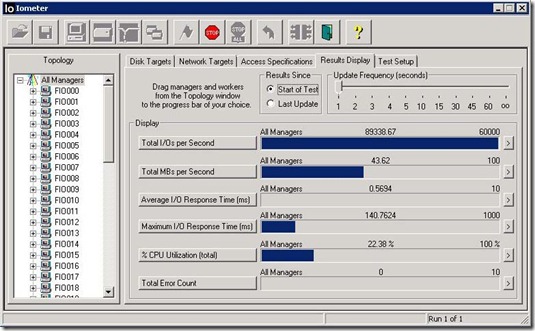
As you can see in the results below, writing directly to the FusionIO card with 512b segments yielded ~90,000 IOPS.

FusionIO Direct 50 Machines

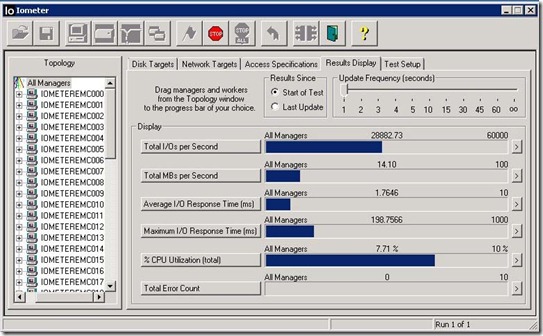
Let’s compare that to a LUN of 5 200GB FC EFDs on the EMC NS-120 connected to UCS blades via Fibre Channel.  Hmm… about ~30,000 IOPS.

EMC-5-200GB-01

Seeing these results made my eyes brighten as I thought about all of the potential they would have if I could use them for storage in a View 4.5 environment.

Technologist